Tuesday, May 24, 2011

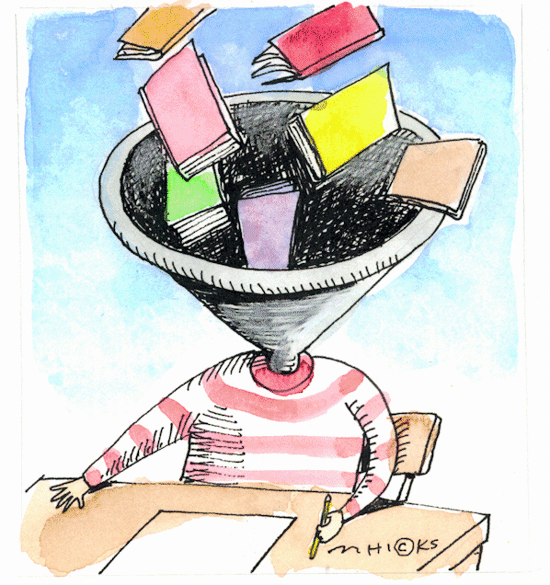
The Worst Experience Of My Learning Life!

I don't know how to begin this post. I have many feelings and I don't know how to convey them. Then, I remember my dear blog. Oh, I can now say anything within me. Now, I'm participating in a training program. Actually, it is not an easy program. It needs great efforts and more concentration. Frankly, I have developed some negative attitudes towards it before even it begins. However, I told myself that the trainer will make it easy and understandable. When we start the program, I liked the trainer's soul and constant encouragement. This meeting was just an introduction to the course and participants. The second meeting was very bad. In the computer lab, we have a datashow and 22 computers. I imagined that he will explain a point step by step, then we try it out. But, all my expectations are gone with the wind.


Oh my God, his sessions are teacher-centered. All the meetings coming are just the same. He pours all the information he has without caring if we understand or not. All what he focuses on is just to finish the required tasks. For homework, we are asked to complete some exercises and send them by e-mail to him. We wait and wait for a long time to get suitable feedback, but in vain. More things happened through these weeks and there are no words to describe them. I don't believe that there are some teachers in the 21st century follow this method.


Me as a student, I'm very intrinsic motivated learner. I'm crazy about learning and searching for every new. I exert great efforts to gain and understand what I learn. I can stay without sleeping for more than two days in order to complete a certain task. I really love learning. It is my life and the air that I breathe. I have got high scores in the exams of this program. But, this trainer killed my enthusiasm and motivation to learn more by his way. This is the first time that I feel a sense of failure. 

In this moment, I remembered my students. I can't stop my tears. Those students come to their schools with a lot of expectations. And then, those teachers who follow the teacher-centered method break all these expectations in a moment. Now, I can feel my students. I'm not like this teacher. I search for any way that engages my students and provide them with many chances to try and explore. I care about their motivation, feelings and dreams.

This is a message to all teachers. Please:

Feel your students.
Put yourself in their place.
Try to draw smiles on their faces while learning.
Dream with them.
Be available when they need you.


For me, I promise to keep every student in my classes motivated and make him or her happy while learning. I will teach them how to be responsible for their learning. I will provide them with a variety of opportunities to be explorers and discoverers. I will exert my utmost to equip myself with all innovative tools, methods and techniques to be ready for any abilities that might come out. I'm lucky to have my brilliant students. All of them have wonderful gifts and talents. It is my job to bring them to life.

One more thing, please give your students time to tell you what they expect from you in order to match their expectations!


Happy Watching!


Friday, May 20, 2011

Further Training ....... But Face To Face


Dear my colleagues,

Please congratulate me as I won the E-Teacher scholarship for three weeks from July 23 - August 13, 2011. I'm one of the 26 selected for the E-Teacher Professional Development Workshop at  University of Maryland, Baltimore County (UMBC) this summer. You can find my name in the announcement on the E-Teacher website:


What about you?
May be we can meet face to face there.


Monday, May 16, 2011

How to Embed a Glog in your Blog!


As a teacher I can embed the glogs that I ask students to create in our class blog. The way to do this is very easy. After creating your glog by Glogster as I mentioned in the previous post, please follow these steps:

1. Scroll down to the end of the page. You will find the following box with a variety of features.


2. Click "Embed into your page".


3. Highlight the link and copy it.


4. Open your blog and create a new post.
5. Click "Edit HTML" Tab and paste the link you have copied.
6. Click "Compose" Tab to view your glog or complete your post.
7. Once you finish, click "Publish Post".


8. When you view your post, you will find your glog a little bit larger. You can make it smaller .by following the step below.

9. When you paste the link you have copied earlier in the "Edit HTML" window, please notice three things (Scale, Width & Height). You can change these values to make your glog smaller. For example:

Scale: 50
Width: 480
Height: 650


Try these steps. If there is any problem, please let me know!


Let's Try Glogging!


During my wiki project, I wanted to make a poster including the work team photos, goal of the project, the tasks required and and my students' voices. Then, I remembered a tool that I have learned about it in one of EVO2011 courses. This tool is called Glogster. Let's know more about it.

What is a Glogster?

It an online tool that allows you to create digital, interactive posters. These posters incorporate text, audio, graphics and video. Here is the the glog that I have created during my wiki project:


How to use Glogster in the classroom?

Instead of using powerpoint to present your lecture- try using glogster! You can include text and images that relate to the material. You can link to additional web resources. It’s an easy, clean way to present information to students. When you finish lecturing, the glogs can be posted online for the students to refer back to later to study for the test.

Glogs can also be used as part of a webquest activity. Teachers can link to websites that contain valuable information. Videos and graphics can be embedded right into the glog so the information is neatly in one place. These webquests are easy to create and the students will have fun exploring the glog.

Students will also love to create their own glogs! Instead of printing our pictures and messing with scissors and glue, images and video can be added right to their glogs. They can express an event in history, a science concept, characters in a story, or math concepts. The value they will get out of the project will depend on the assignment they are given. Assignment should be structured so that they are providing valuable information, but can also use they creativity and express themselves!

How to Create a Poster on Glogster?

It is so easy to create your first glog. Please follow these instuctions and videos and you can do it in ten minutes:
  1. Go to Glogster.com and set up your account. The first screen you will see is your dashboard. Choose the "Create a new Glog" button.
  2. Select "Wall" from the magnet toolbar that sits on top of your Glog to the left. This changes the background art on your poster. There are several genres from which to choose, ranging from emo to goth to hippie.
  3. Select "Images" from the magnet toolbar. Choose a picture from your computer and upload it. Glogster also allows you to link to online media or using the Grab feature, Glogster will initialize the camera or video equipment on your computer to create new media.
  4. Position your photo by dragging it to the desired location within your Glog. A new toolbar will now appear, allowing you to add special effects, frames and experiment with color work.
  5. Add graphics to your Glog by selecting the button on the toolbar. Hundreds of themed graphic and animated images are available as stock options in Glogster. Simply drag and drop them where appropriate.
  6. Add text by selecting the button on your magnet toolbar. This will open a box allowing you to choose a text frame. Drag and drop it at the location you desire. Select Edit on the new toolbar that is found near the top of the frame. You will now be able to type in your text, change the font style and size, and use other special effects.
  7. Add video and sound in the same way as the other features. Select the appropriate feature from the toolbar. Select upload, link or grab. Add special effects.
  8. Continue adding images and other effect to create your Glog. Glogster has thousands of examples available from which to draw inspiration. Once you are pleased with your Glog, select the preview button and finally the publish button.

Glogster in 90 seconds


Adding Wall


Adding Text

Adding Graphics


Adding Sounds


Adding Videos


Adding Links


Examples of Educational Glogs:

Here are some glogs created by other teachers. You can use them with your students or consider them as a model for you:

By using this tool, I think that teachers can integrate all language skills in a way that make students feel very happy. This tool allows students to play with colors, texts, sounds and videos. Of course, this is what students need. Try it and find the difference.

Resources:
  1. http://cnx.org/content/m32202/latest/
  2. http://www.slideshare.net/catherinelambert/using-glogster-in-the-classroom-2550646
  3. http://www.ehow.com/how_5941261_create-poster-glogster.html

Friday, May 13, 2011

What is after Oregon Experience?

Coming Back With Exciting News

I stopped writing in my blog a long time ago. This doesn’t mean that I forgot all what I have learnt during Oregon Experience. Actually, what delayed me to write is the circumstances of my work. I have moved to a secondary school which is not technologically equipped to a large extent as my old school. You know it takes a lot of time to change people’s minds and beliefs about using technology. However, my brilliant students encouraged me to take risks and try new things with them.

My Wiki Project:

Among the web 2.0 tools that I have tried with my students is WIKIS. I have used www.wikispaces.com. It is a wonderful website through which you can create your own free wikis. It is a little bit flexible. You can change the template of your wiki, add pages, collaborate with more than 100 persons, and more exciting things. You have a space of 2 GB to add pages, images, videos, files, … etc. I think it is a very wonderful environment where students can try out things.


Target Students:

My target sample is 1st-year secondary students. They are between 16-17 years old. They are very good at using computers and the internet. Some of them have created fantastic videos and uploaded them on YouTube.

School Setting & Computer Lab:

As I said before my school is technologically poor. Yes, it has a computer lab with 10 sets, but without an internet connection. However, there is some sort of a hope in the Resources Room. It has a computer with an internet connection and a datashow. I have made use of these tools as possible as I can. Also, I have used my laptop with USB Modem as it is available all the time with me when my students need a help.

Goal of the Project:

The main goal of my project is to invite all tourists from all over the world to come again to Egypt after 25th Jan. revolution. Every student has selected a certain topic to write about in his/her page in the wiki.

Skills Developed in the Project:

1. 4 language skills: reading, writing, speaking & listening.
2. Higher thinking skills: analyzing, evaluating & creating.
3. Searching skills: using Google and YouTube to search for information, images and videos.
4. Communication skills through using chatting and sending e-mails.
5. Collaboration.

Method of Teaching:

It is a self-learning experience. I’m just a guide throughout the two weeks of the project. At the very beginning, I have met them in the Resources Room that is with just one computer and a datashow. I have prepared a PowerPoint presentation including the goal of the project, objectives, tasks required, and the product that is our wiki titled “WELCOME BACK EGYPT”. I have also designed some tools before the project. These tools help students to complete the project and learn according to their pace of learning. Among these tools are needs analysis survey, rubric, wiki guide, example to follow, quizzes, opinions’ sheet and recognition certificate to thank them for their great efforts.

We have used many tools to help each other throughout the project, e.g., face-to-face discussions during school day, chatting and sending e-mails. We have also used mobiles for urgent cases. Students help each other through commenting in the discussion section of their pages in the wiki. They also send e-mails to each other in the wiki itself as one of the Wikispaces’ features.

In short, it is a pure online learning experience in which students have used a lot of technological tools, e.g., wikis, e-mails, websites (Google, YouTube, ... etc), mobiles (either as a communication tool or recording their voices talking about their experiences during the project), and podcasting (It is another web 2.0 tool and I will talk about it in a separate post later).

My Opinion:

It is a really tiring job, but I feel very happy in all the stages of the project. It is enough for me to see how happy my students are while working in their pages. They like the idea of using the internet in their learning. They told all the students in the school about the skills they have gained in this project. Other students asked me to do the same with them. I promised them to create another wiki next year as we are about to finish this school year. You can see my students’ opinions about this project in the section of “Opinions’ Sheet”. This gives me a very strong push towards trying and taking risks.

Now, I will leave you with my students' wiki and wait for your comments! Click the following image to visit our wiki!